Showing posts with label freepattern. Show all posts

Wednesday, January 15, 2014

Textured Toddler's Hat

I like the texture this stitch gives.  It's a crochet that's most like moss or seed stitch.  It's not lacy, so it's versatile and can be tailored for boys or girls.


The pattern is very simple.  With moss stitch you purl where you knit in the row below, with this crochet stitch you sc where you dc in the row below.

For this one I used a worsted weight yarn and size H hook.

Start with a magic or sliding ring.  Here's a tutorial from Craftsy on that.  http://www.craftsy.com/blog/2013/09/demystifying-the-magic-ring/

Round 1
chain 3 (first DC)
9 DC in ring for a total of 10
slip stitch to join at first chain 3

Round 2
Chain 3 (first DC) sc in same space.  
Repeat with a DC & SC in every DC around - total of 20 stitches
slip stitch to join at first chain 3

Round 3
Chain1 SC in first stitch (the chain 3 from the row before) DC & SC in next stitch
DC in next stitch, SC & DC in next
*SC next  DC & SC in next stitch
DC next SC & DC in next
repeat from * around ending on a DC
slip stitch to join at first sc

Round 4
Chain 3 (first DC) SC next, DC&SC in next
*DC next stitch,  SC next, DC & SC in next
repeat from *around ending with SC
slip stitch to join at beginning chain 3

Round 5
chain 1 SC in first stitch  DC next stitch SC next stitch DC&SC in next
DC next stitch, SC next, DC next Stitch, SC &DC in next
*SC in next stitch, DC next, SC next, DC&SC in next stitch
DC next stitch, SC next stitch, DC next stitch, SC&DC in next
Repeat from * around ending with DC
slip stitch to join at first SC

This is where I ended the crown - the hat fits a 1-2 year old.  Keep working in the same pattern to make it larger, or use a larger hook or yarn

Round 6
Chain 3 (first DC) SC
*DC next, SC following stitch 
repeat from * ending on SC
join with slip stitch to beginning chain 3

Round 7
Chain 1 SC first stitch, DC next
*SC following stitch, DC next
Repeat from * around ending with DC
join with slip stitch to first SC

Rounds 8-13 repeat Rows 6&7

Change colors for stripe
Continue in pattern repeating rows 6&7 for 3 more rows

change back to main color

Chain 1 sc in first stitch and around
join with slip stitch to first stitch
fasten off
weave in ends

Leave it plain or fancy it up with flowers or appliques.


Finger Knit Braided Scarf


I got tired of playing with thread last night and decided to work on a scarf.  I have not done much with finger knitting in the past, so I decided to give it a try.

It's superfast.  I think it took me less and an hour and a half to make this scarf - even stopping to take pictures.

It's a braided scarf, so you need to make 3 pieces the same length.  Even making three skinny - 70 inch long scarves, it took less than an hour and a half.

I used some Loops & Threads Country Loom that I had left over from an afghan - took most of a skein.

Finger knitting is a lot like using a loom, only your fingers are the pegs.  It's something lots of people learn as children.  I didn't, but that's what I hear.  Start by weaving the yarn in and out around your fingers.   I'm right handed, so I wove on my left hand.


Than go back, so that you have yarn on both sides of your fingers.


Repeat so that you have two rows of yarn on your fingers.


Then bring the bottom row up and over the top row and off of the fingers.  That leaves one row of yarn.  The piece will build up on the back of your hand.

Repeat the last two steps, wrapping and pulling over until you have a piece that is a bit longer than you want the finished scarf to be. 


When you have your desired length, don't bind off.  Bring a piece of yarn through all 4 loops and then tighten and secure it.


Make 3 pieces the same length & braid them together.


Secure the ends and add fringe.


That's it.  You're ready to wear or gift it!


Tuesday, January 7, 2014

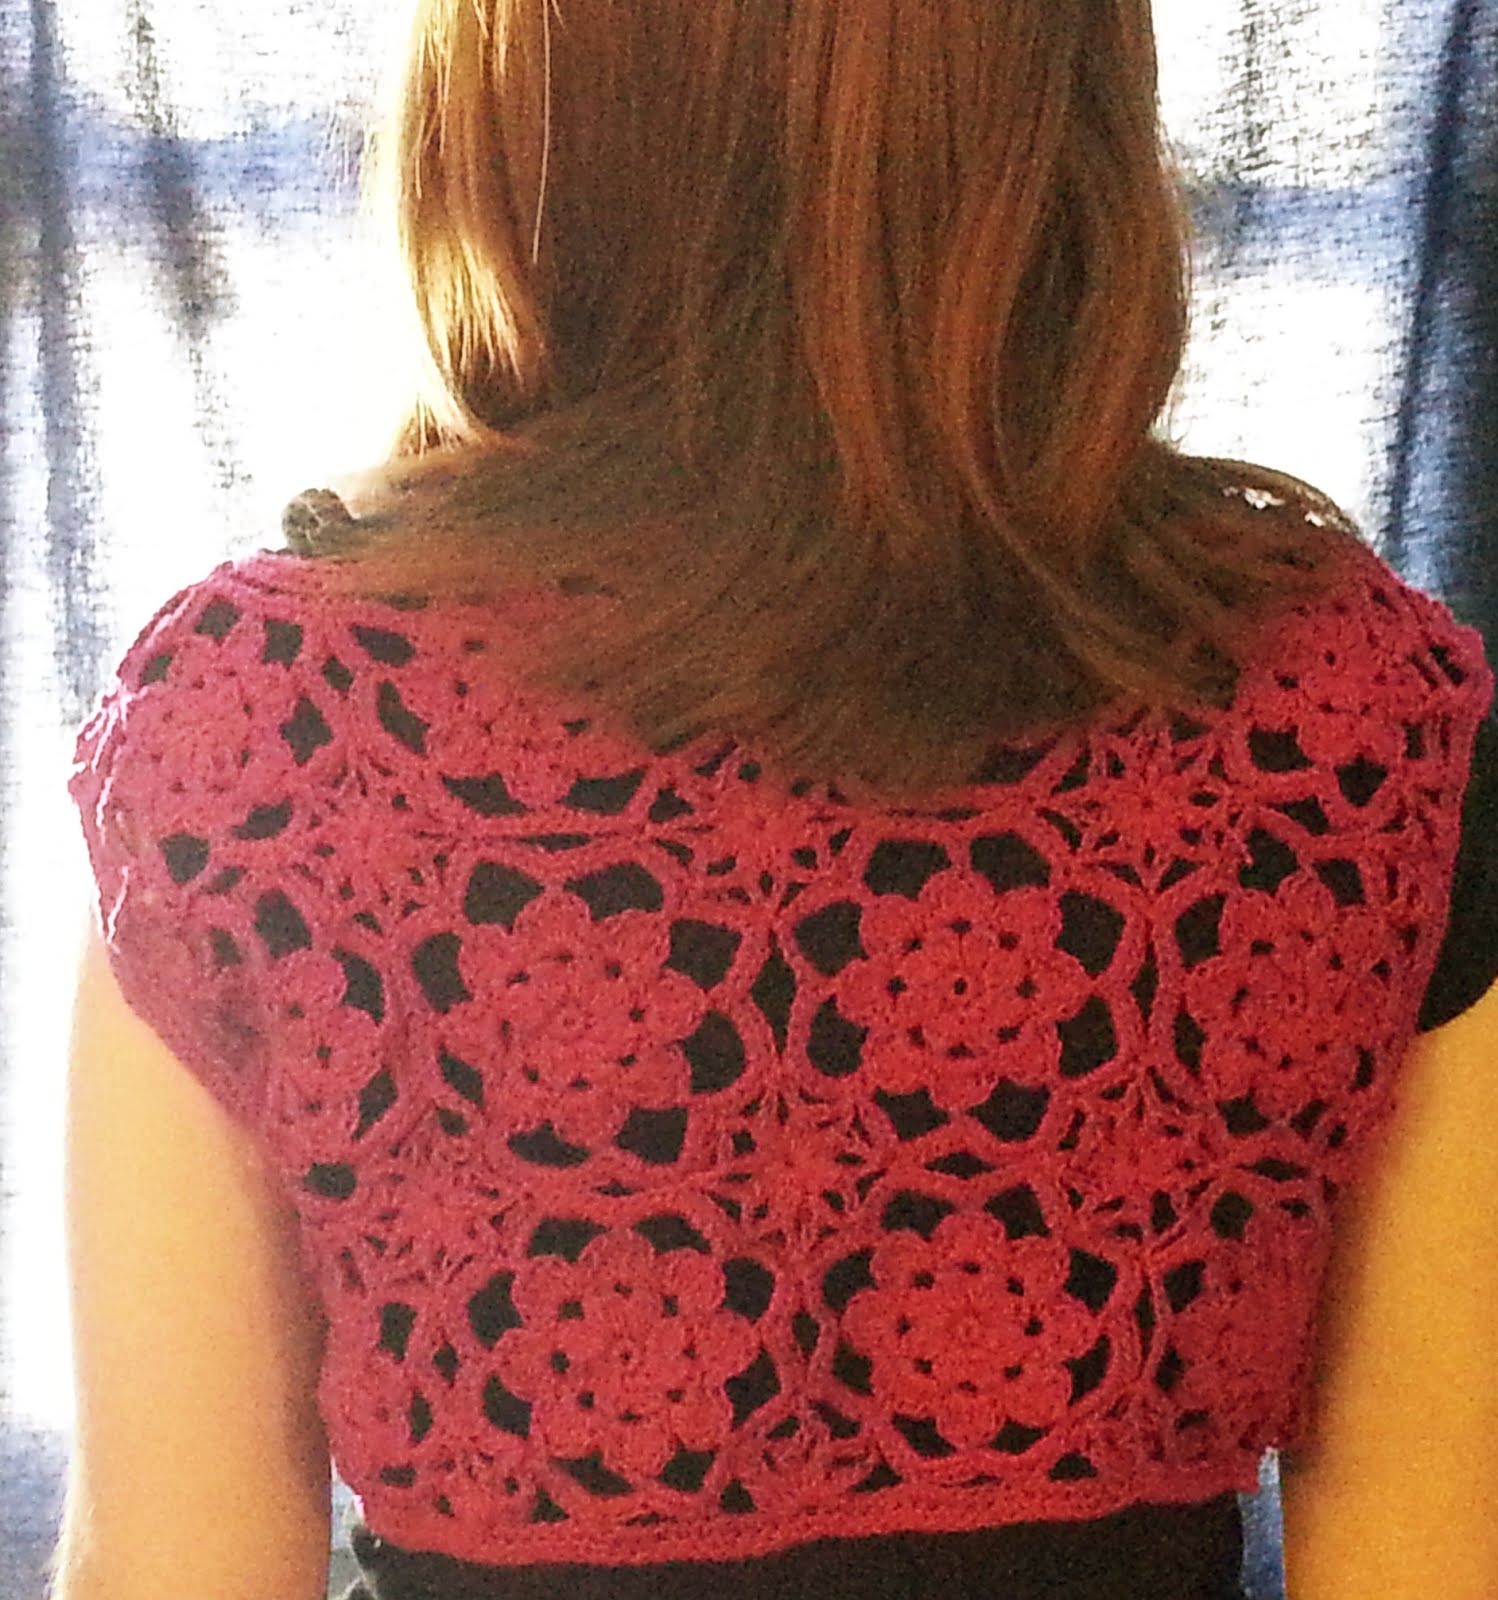
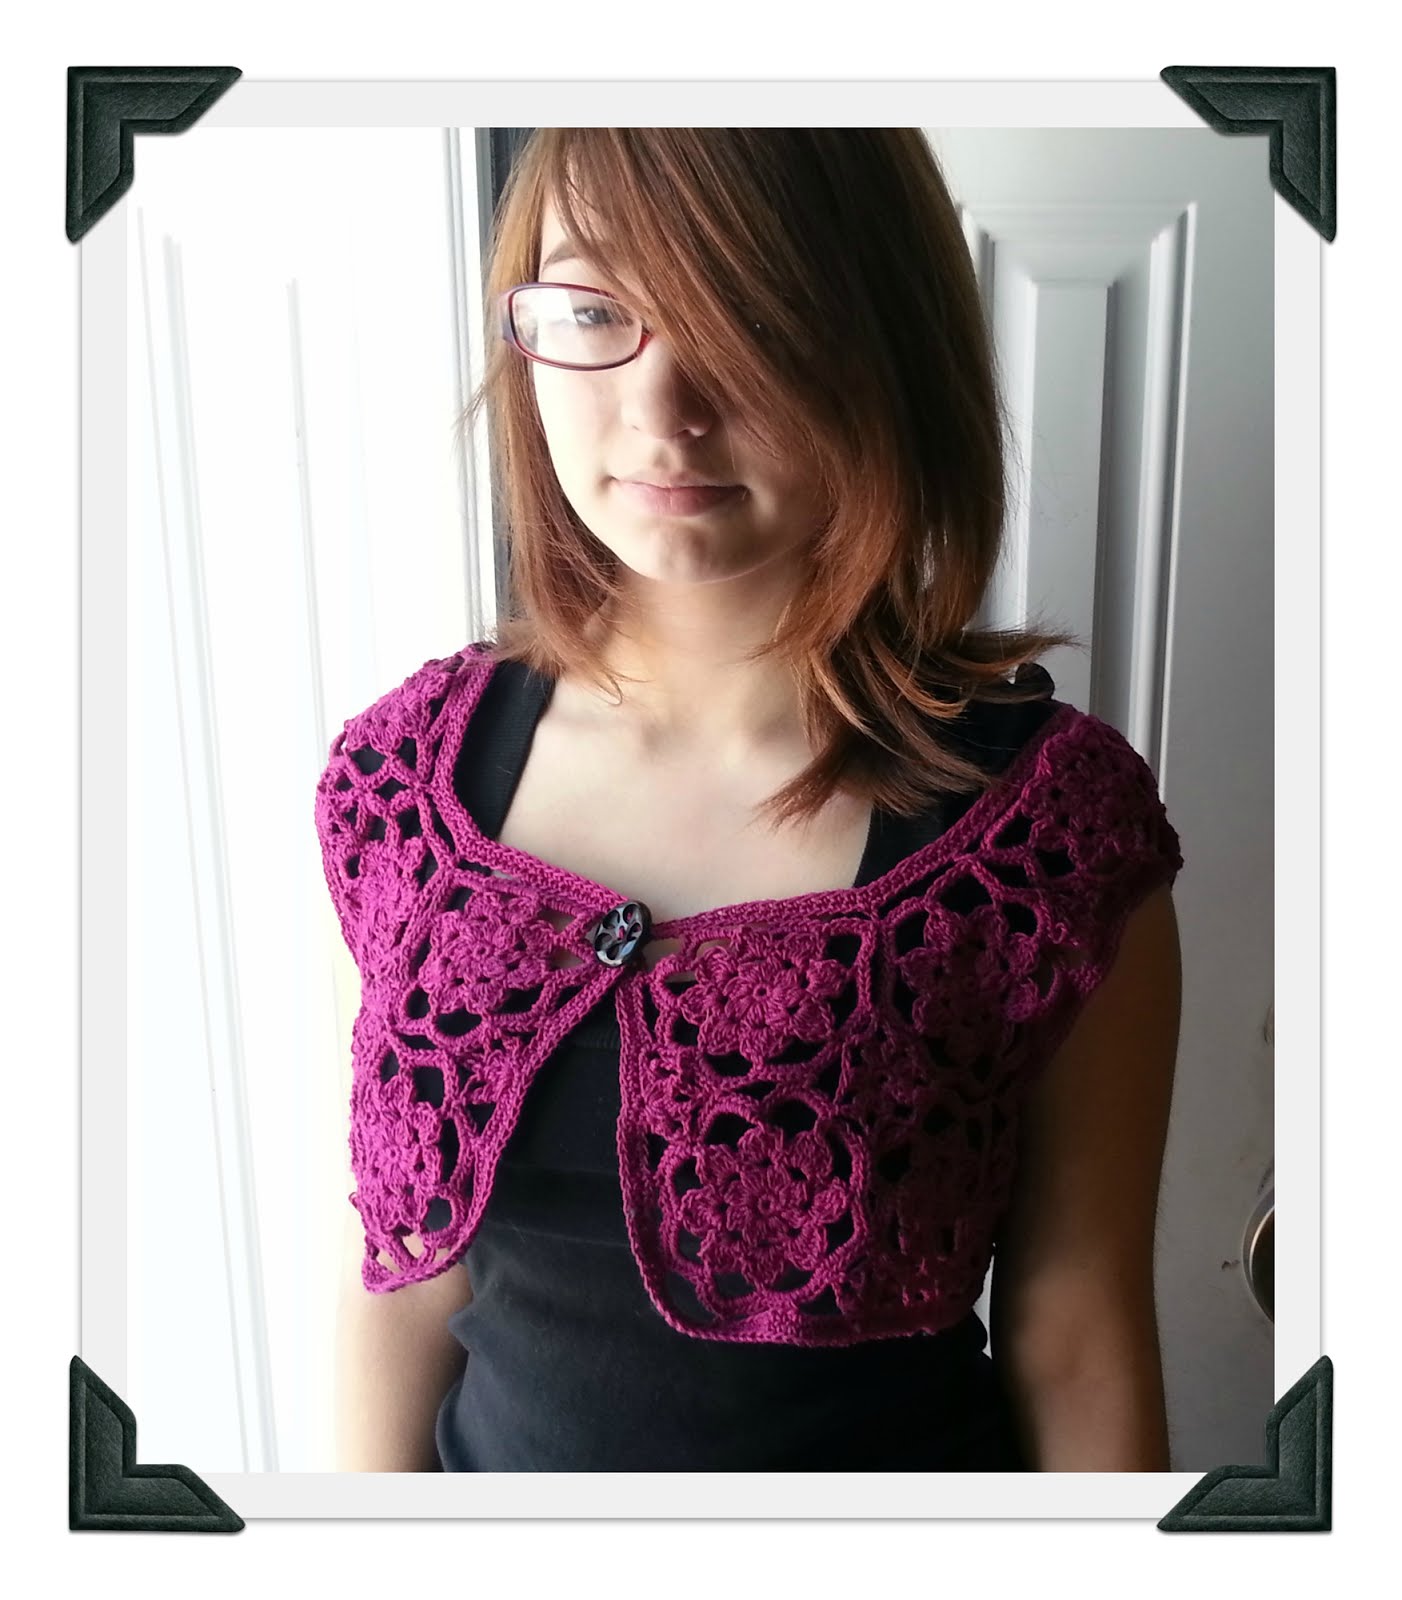
Efflorescence Bolero


The instructions are for size small/medium.  I didn’t write up larger ones, but I don’t think it will be hard to alter.  Use larger yarn/thread or add a few motifs.   

materials:

Size 5 crochet thread.  I used 4 50gram balls with 150m each.  Well, 3 and part of the 4th.  

3.5mm crochet hook

large button

----------------


Made from 26 main motifs with 14 small (fill-in) motifs and 26 half small (fill-in)  motifs

Main motif - make 26
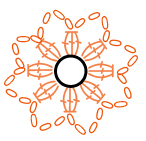
small motif - make 14  Can be made before assembly, but just as easy to make them as you put them together.
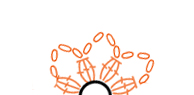
half small motif - make 26 (really easier to not make ahead of time and just add them after the border is done)  


Main Motif

Start with magic or sliding ring
R1 - 8 sc in ring  draw ring tight

R2   3 sc (first leg of cluster)
yo insert hook into first stitch, yo draw yarn through
yo insert hook into same st, yo draw through 2 loops
yo and draw through all loops on hook.

ch3
*yo insert hook into next stitch, yo draw yarn through
yo insert hook into same st, yo draw through 2 loops
yo and draw through all loops on hook.
Ch3

Repeat from * around for all 8 sc on row 1
join with slip stitch to top of first cluster


R3 slip stitch to first chain 3 space
ch1
* sc in chain 3 space
  5 dc in same space
  sc in same space

Repeat from * in all 8 spaces

join with slip stitch to first sc made

R4
slip stitch to 3rd DC in first group.
Chain 1
sc in same space
chain 9
*sc in 3rd DC of next group
Chain 9
repeat from * around
join with slip stitch in first sc made

R5 chain 1
11 sc in each chain 9 space around

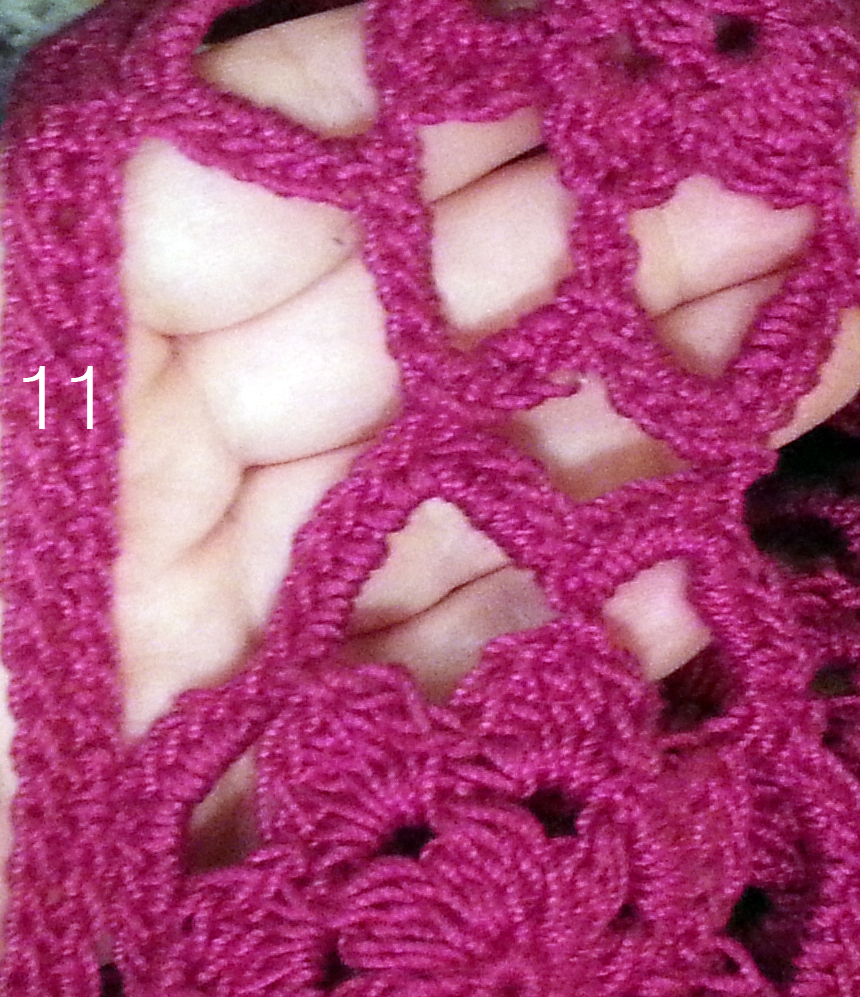
To join as you go it helps to think of each motif as a square with 2 11 sc sections making up one side.  

Attach motifs by doing 5 sc in the chain 9 space and then using the 6th sc to connect the motif to the 6th sc in the matching section of another motif.  Then sc 5 more to finish that section.

or make all the motifs and attach them at the corresponding 6th scs


Small Motif

These fill in the space left after join the main motifs


Start with magic or sliding ring
R1 - 8 sc in ring  draw ring tight

R2   3 sc (first leg of cluster)
yo insert hook into first stitch, yo draw yarn through
yo insert hook into same st, yo draw through 2 loops
yo and draw through all loops on hook.


(there are only 3 legs to this cluster instead of 4 as on the larger motif)

After the first cluster is made you should decide if you are going to join it as you go or make and then sew them together.

To finish the motif and then sew them:

Continue R2 by chaining 4 and making clusters in each sc from R1.  Slip stitch to beginning cluster and fasten off

To join as you go, ch2, slip stitch into main motif and then chain 2 before making next cluster.  repeat around.  You will have 8 clusters and 8 joins.

The joins are illustrated in the picture below
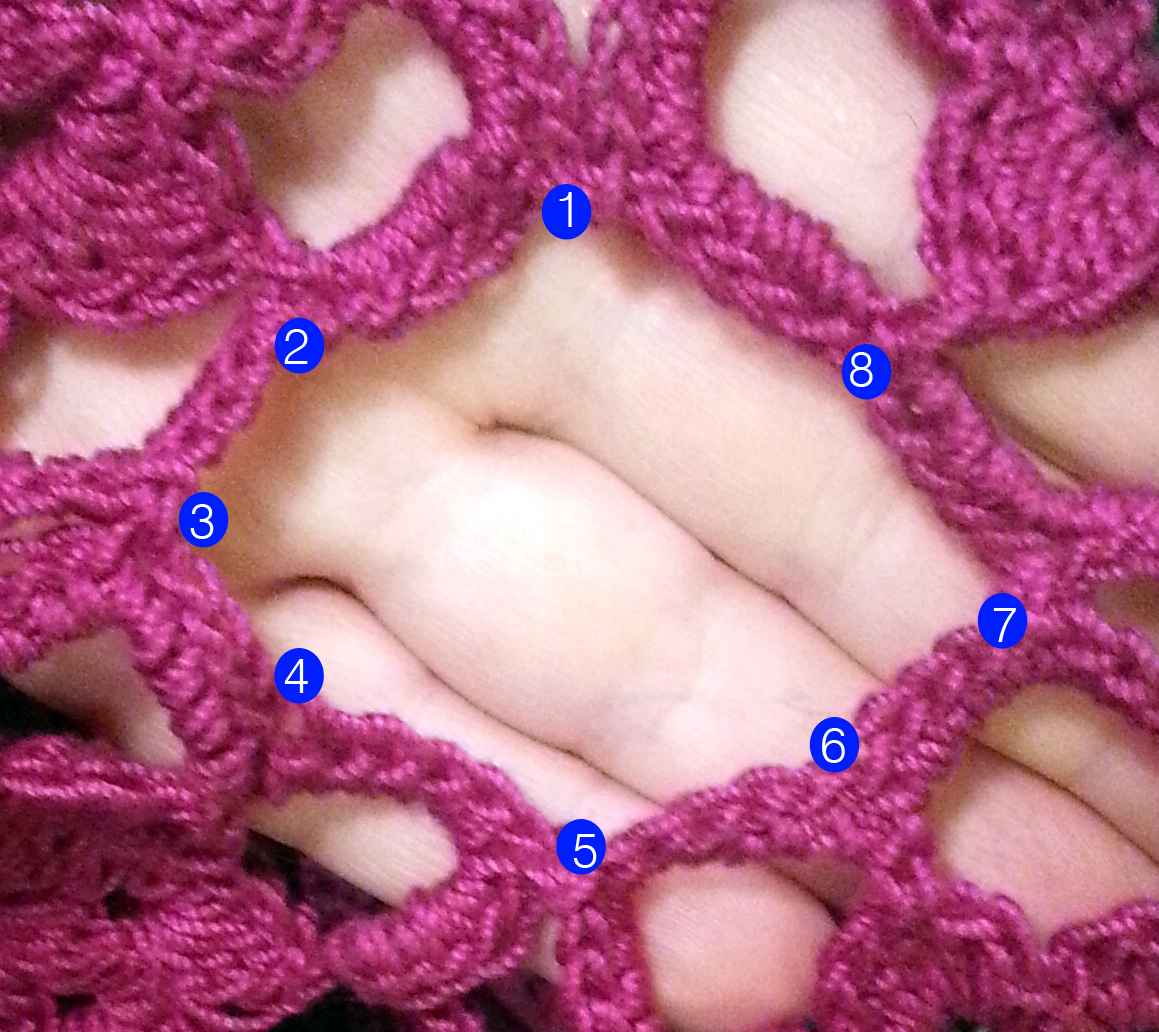


This is the layout.  The half motifs are shown, but I found it easier to add them after making the sc border.

To do the border

Attach thread at any point, I chose the back.

When chaining between points on the same motif, chain 7
between motifs - chain 11
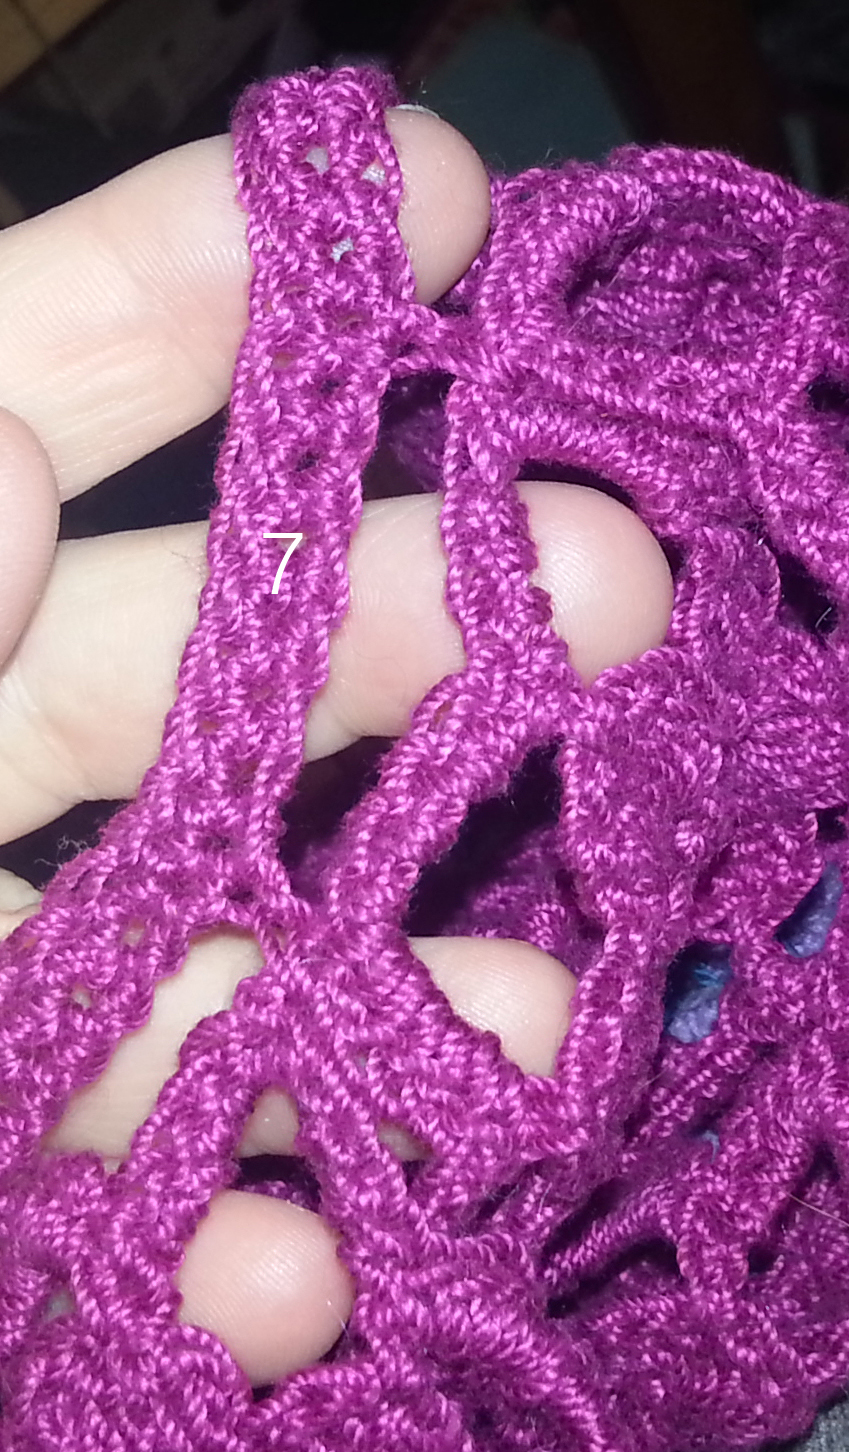
 

The half motifs will be put into the chain 11 spaces.

On outside corners there will be several chain 7 spaces in a row

Inside corners are a bit trickier.  Just doing 11 between motifs will create too large of a gap, so  instead chain 7, dc  into join between two motifs and chain 7 to next motif


After you’ve gone all the way around the vest,  the next two rows of the border are just sc.  don’t sc in the spaces, make sure to work in the stitches so that you have 11 in 11chain spaces and 7 in 7 chain spaces, 1 in each sc or dc.  It’s a firmer finish if you work the stitches not the spaces.


The half motifs can be made and then sewn or added after the border is finished. 
 There will be 4 clusters and 3 joins


If you are making them and sewing, start with a magic ring and work same as small motif until you have 4 clusters done with 3 chain 3 spaces.  Fasten off.

To work after making border  

Attach yarn to stitch 6 of an 11 space.  

Work cluster as in small motif.  Chain 2 and then slip stitch into the join on vest.  Chain 2 and work next cluster in same stitch.

Make a 4th cluster after the 3rd join and fasten off.  

I tried to weave in ends as I went because that’s my least favorite part and too many items end up in the UFO pile if I wait to do it.

Blocking with a steam iron is a breeze.

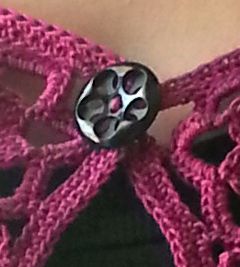
Add a large button to one side of the front and use a loop from the other side as a button hole.

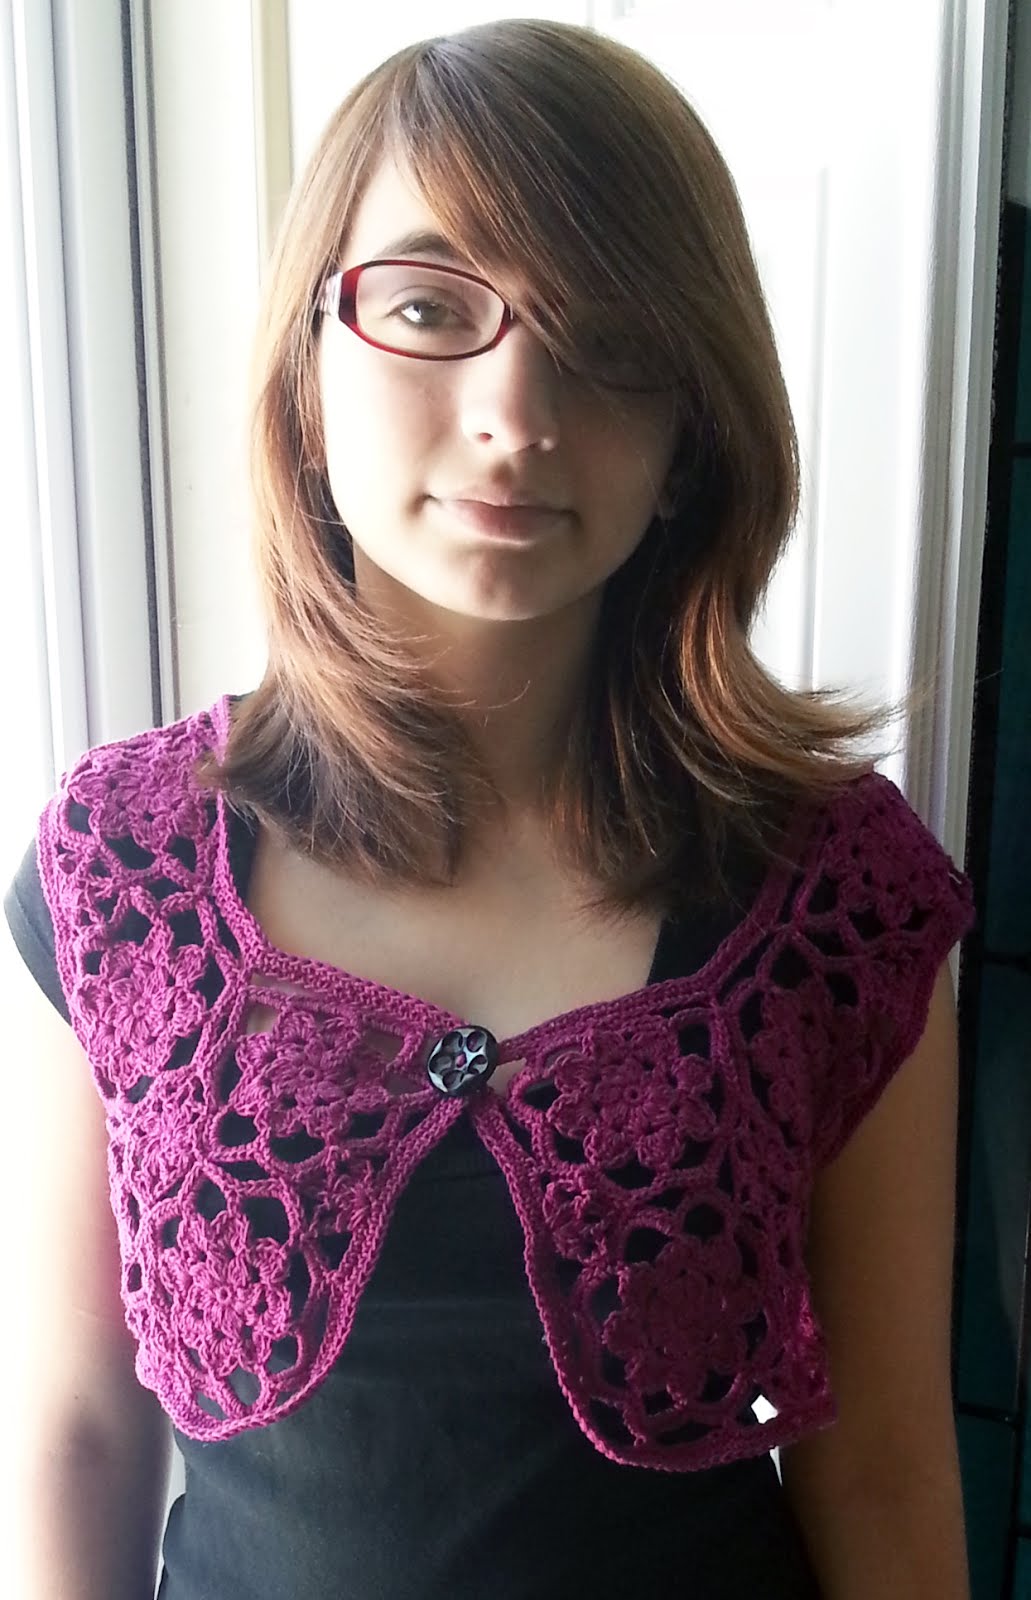


My model is 5’, size 4

This one hasn't been tested. Working on that this week - We'll see if any changes are required.


Saturday, January 4, 2014

Hippo Booties

Hippo Booties


I used a medium yarn (Simply Soft) to make the booties.  
G hook for newborn
H for 0-3 months and larger


I tend to crochet tightly, so you may want to adjust hook size to fit your personal style.


Materials needed
Less than 50 yards of body color
Less than 25 yards of sole color
3 yards or less for embroider of mouth
small bits of felt for teeth.
buttons for eyes
sewing needle, sewing thread for attaching eyes
yarn needle for embroidering mouth and weaving in ends


Abbreviations
ss - slip stitch
ch - chain
sc - single crochet
hdc - half double crochet
sc2tog - single crochet 2 together
hdc2tog - half double crochet 2 together


3-6 month size is in parenthesis and bold print.  You can also increase to 3-6 month size by using an I hook but I found that made the bootie too wide.


In Sole color


Ch 10 (12)


Round 1
Sc in 2nd ch from hook
sc in next 7 (9) ch
5 sc in last chain  (toe)
Working in free loops on back side of chain sc next 7 (9)
2 sc in last ch (heel)
join with ss to 1st sc


Round 2
Ch2 (counts as first hdc), hdc same stitch
hdc in each of next 7 (9) sc
2 hdc in each of next 5 sc
hdc in each of next 7 (9) sc
2 hdc in each of last 2 sc.
join with ss to top of first ch 2


Round 3
Ch 2 (counts as first hdc), hdc in same stitch
hdc in each of next 12 (14) stitches
2 hdc in each of next 3 stitches
hdc in each of next 12 (14) stitches
2 hdc each of last 2 stitches


Switch to body color


Round 4
ch 1, sc same stitch and in next 13 (15) stitches
2 sc next stitch
sc next 2 stitches
2 sc next stitch
sc around
join with ss to first sc


Round 5
ch 1, sc same stitch
sc next 9 (11) stitches
hdc next 15 stitches
sc around rest


Round 6
ch 2, counts as first hdc here and throughout
hdc 9 (11)
hdc2tog 8 times
hdc around


Round 7
ch 1, sc same stitch and in the next 9 (11) stitches
sc2tog 4 times
sc around


Round 8
ss first 9 (11)
sc next stitch
hdc next 2 stitches
sc next stitch
ss around.


Fasten off.


Ears and top of head  (same for all sizes)


Row 1
Fold bootie in half and count 4 stitches back from toe.  Join yarn in 4th stitch.
ch 1, sc same stitch
sc next 7 stiches


Row 2
Ch 2, (4 hdc, ch2, ss) first stitch [first ear made]
sc next 6 stitches
(ss, ch2, 3 hdc, ch2, ss) last stitch [second ear made]


Row 3
ch 1, skipping stitch with ear sc next 2 stitches (this will pull the ear gathering it a bit at the base)
hdc next 2 stitches
sc next 2 stitches
ch 1, skipping stitch with ear, ss to other side.  You will have to attach to the top of the previous row.  If you just ss in las stitch the second ear won’t be gathered.


fasten off.


Weaving in the ends BEFORE embroidering mouth or attaching eyes is a good idea.  I’ve found that when I don’t do this as I go along, there is a sewn together mess inside the toe.


Embroider mouth along the line between sole and body.  Curve ends up on face for a smile.


Cut two very small rectangles for the teeth and sew them on just under the smile.


Attach eyes up high, between the ears, sewing securely.  I like to add a bit of fray check to the threads on back where I have attached the eyes to make sure they stay secure.  


although I didn’t include them in the directions because I have not tested them, I’m confident you can increase the size to 6-9 months by increasing length 2 more stitches.  Same width will probably still work.


This pattern is (c) 2012 by Stacey Lynn. All rights reserved.  Please do not redistribute in any form, written or electronic.  Any items made from this pattern are yours to keep, give or sell.  After all, you did the work.