
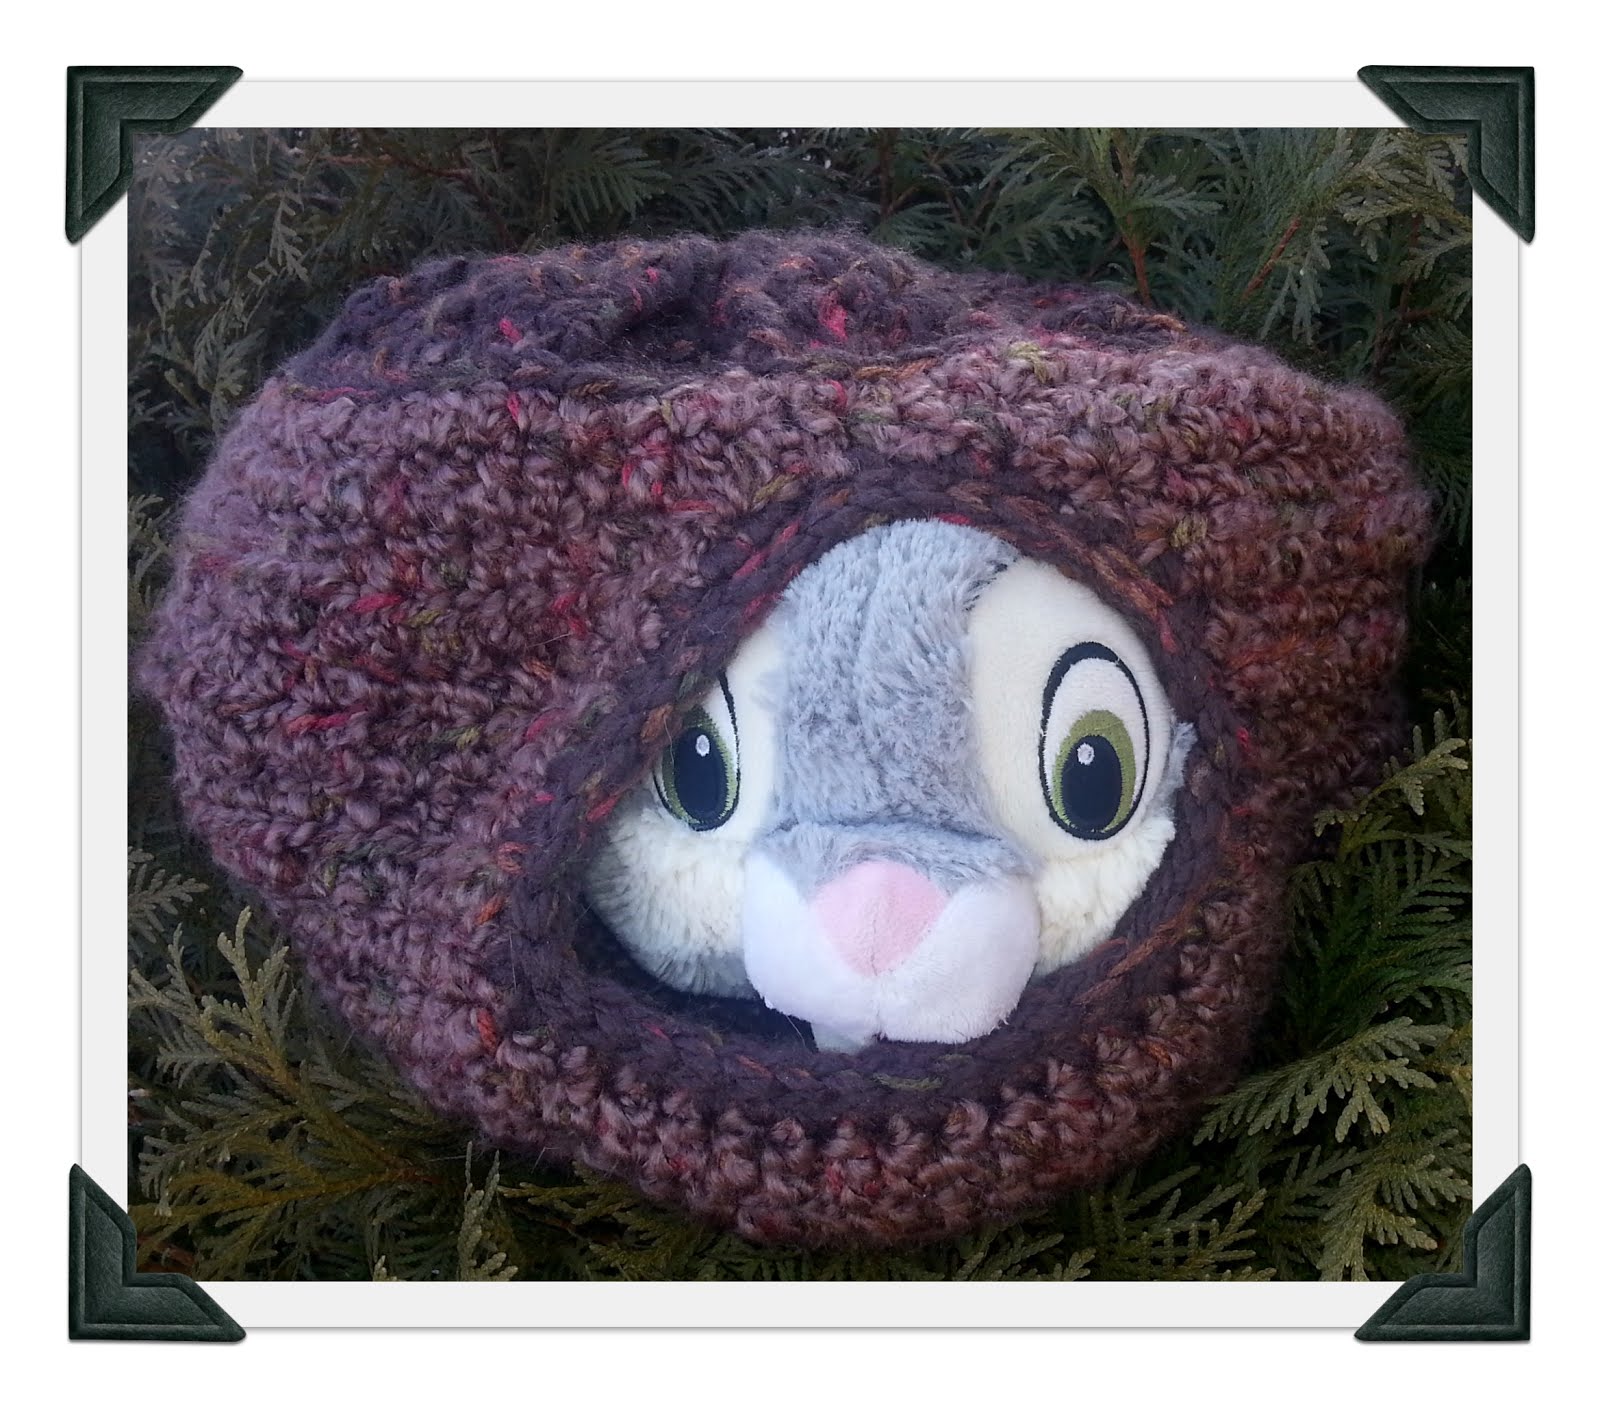
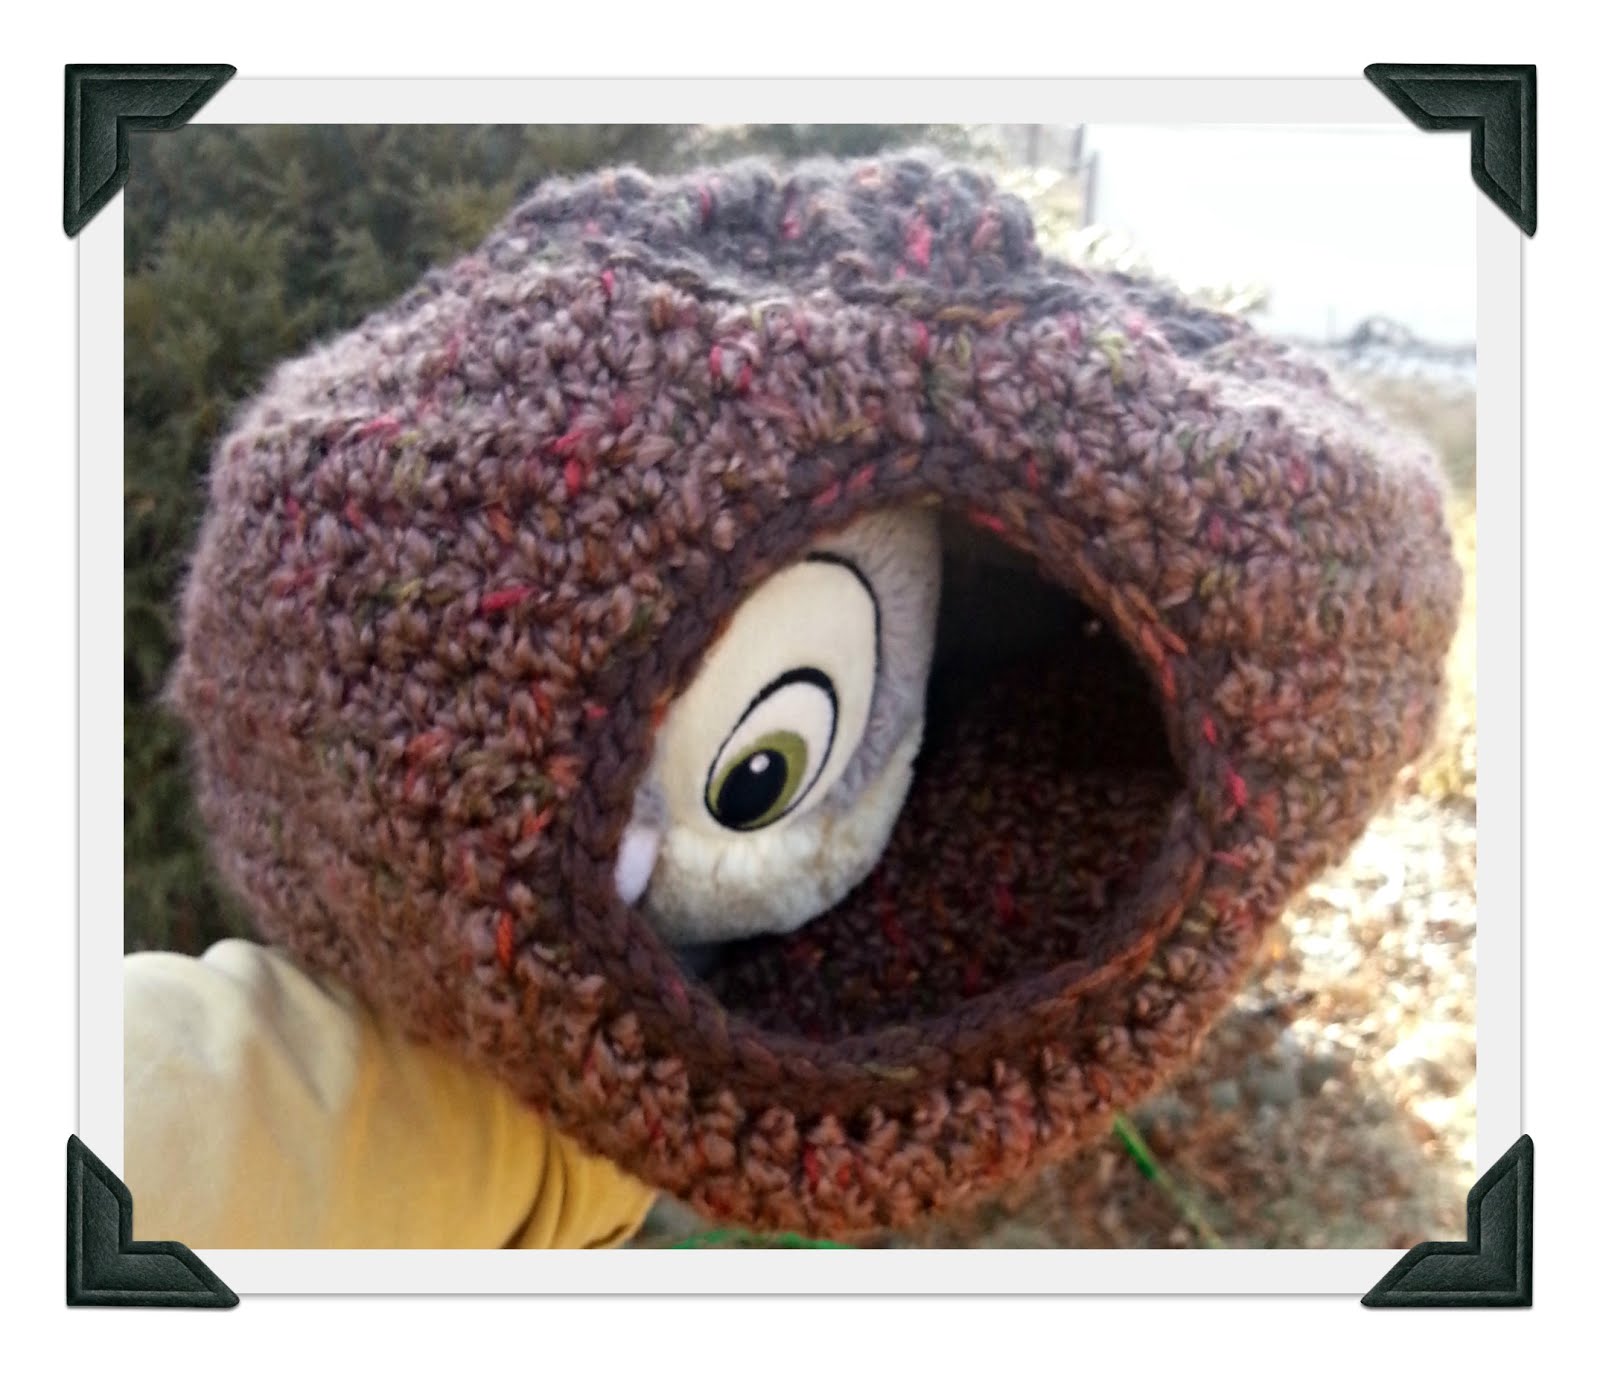
A soft, warm, hidey space for kitty to get away from it all. Or a small dog who just needs a break from the big world. I don’t have a cat OR a small dog, so Thumper had to stand in as my model. His heads a bit bigger than a cat,his body is smaller, but you get the idea. It’s a gift for my daughter, so I’ll add photos of actual kitties playing with it when she gets them.
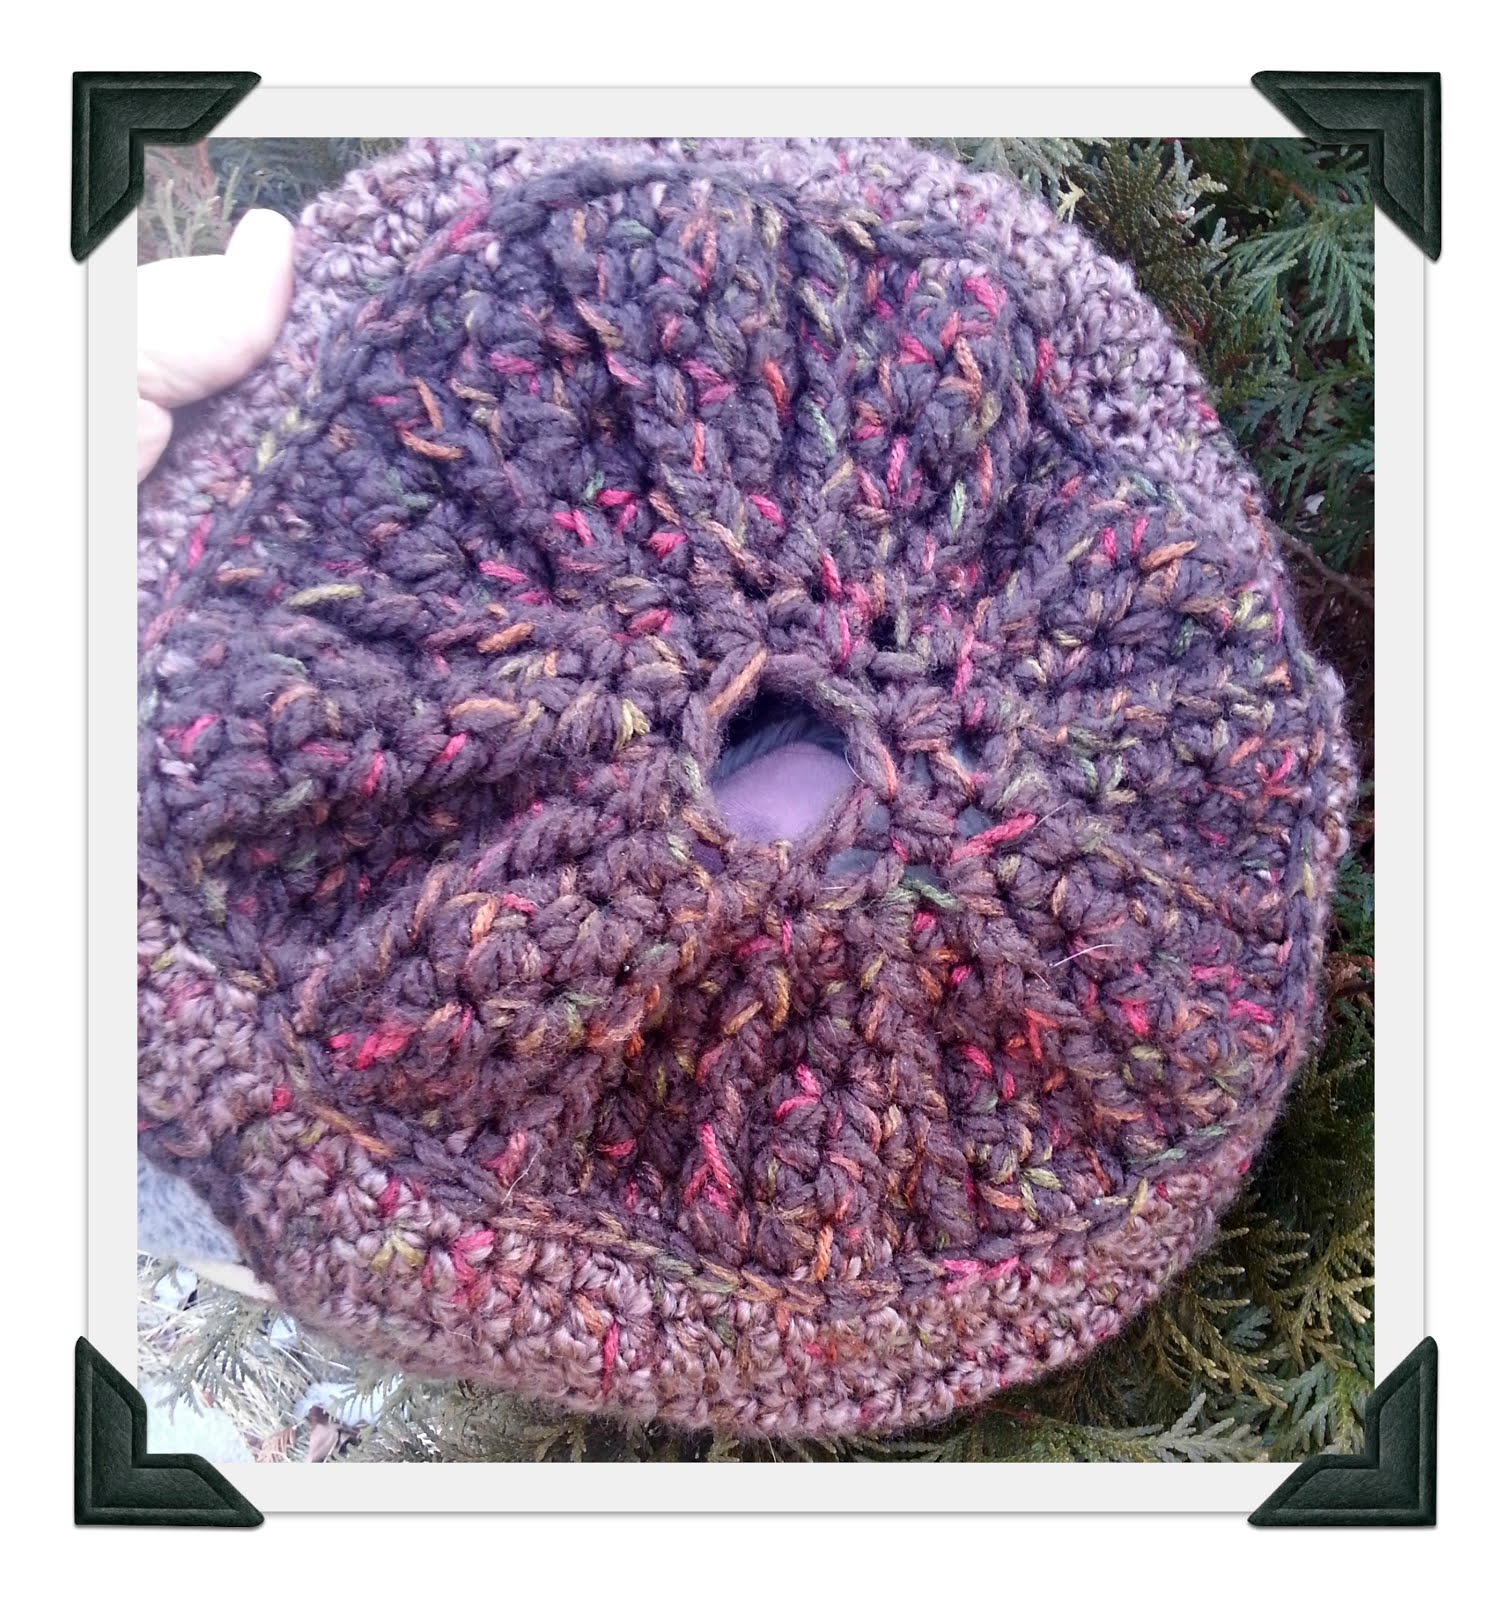
I used double strands of yarn to make this extra thick. It does collapse flat when you want to put it away. When you have it out for kitty, just open it up and kitty has a nice hiding space. The colors I used and the shape made me think of some kind of chocolate puff pastry. I almost named it “Puff Pastry with Kitty Filling” but that didn’t seem to be a search engine friendly name - so Kitty Keeper it became.
Materials
Crochet Hooks sizes I & J
Yarn is whatever you want. Just make sure to make it extra bulky. Either by using a size 6 yarn or by holding two strands together like I did. Ideally you want the yarn to need at least a K hook, and by using a J it’s much tighter.
I used
1 skein Homespun (body)
1 skein Carisma (top)
1 skein medium weight (4) acrylic that I found at a thrift shop - this one I used throughout, in both the body and the top. I wanted the top to be a different color, so I switched. If you choose to make it all one color, be sure to have 2 skeins of that yarn.
stitch marker
large yarn needle
ch- chain
sc - single crochet
hdc - half double crochet
ss - slip stitch
fphdc - front post half double crochet - (check out this page if you need help) http://crochetparfait.blogspot.com/p/fphdc-front-post-half-double-crochet.html
hdc decrease - half double decrease ( check out this page if you need help) Ihttp://www.crochetguru.com/half-double-crochet-decrease.html
With the larger hook.
R1)
make a magic/sliding ring
10 hdc in ring - pull ring until stitches touch, ss to first hdc
R2)
ch 1
2 hdc in same stitch and every stitch around
join with ss to first hdc
R3)
Ch 1
2 hdc in same stitch
1 hdc next stitch
*2 hdc next stitch
1 hdc next stitch
repeat from * around
join with ss to first hdc
R4)
Ch 1
2 hdc in same stitch
1 hdc each next 2 stitches
*2 hdc next stitch
1 hdc each next 2 stitches
repeat from * around
join with ss to first hdc
R5)
Ch 1
2 hdc in same stitch
1 hdc each next 3 stitches
*2 hdc next stitch
1 hdc each next 3 stitches
repeat from * around
join with ss to first hdc
R6)
Ch 1
2 hdc in same stitch
1 hdc each next 4 stitches
*2 hdc next stitch
1 hdc each next 4 stitches
repeat from * around
join with ss to first hdc
R7)
Ch 1
2 hdc in same stitch
1 hdc each next 5 stitches
*2 hdc next stitch
1 hdc each next 5 stitches
repeat from * around
join with ss to first hdc
R8)
Ch 1
2 hdc in same stitch
1 hdc each next 6 stitches
*2 hdc next stitch
1 hdc each next 6 stitches
repeat from * around
join with ss to first hdc
R9, 10, 11)
Ch 2 - counts as first hdc
hdc around
join with ss to first hdc
R12)
Switching to rows. Before starting this one, count backwards 17 stitches from the hook. Place stitch marker here. This is where you will end the first row
Ch 2 - counts as first hdc
hdc across to stitch marker
R13)
ch 2 - counts as first hdc
hdc across
R14)
Ch 2 - counts as first hdc
hdc across
R15)
Ch 2 - counts as first hdc
hdc across
R16-18)
For the next 4 rows you will increase two stitches - one on each end
Ch 2 - counts as first hdc
hdc same stitch
hdc across to last stitch
2 hdc last stitch
R19)
same as previous 3 rows except that after working 2 hdc you will go back to working rounds by
ch 1
join with ss to first starting ch2 of row
R20)
ch 2 - counts as first hdc
hdc around, being sure to hdc the ch1 right before the join
join with ss to first hdc
R21)
ch 2 - counts as first hdc
hdc around
join with ss to first hdc
R22)
This is where I switched colors
ch 2 - counts as first hdc
hdc next 4 stitches (5 in between)
fphdc next stitch
*hdc next 5 stitches
fphdc next stitch
repeat from * around
join with ss to beginning hdc
R23)
ch 2 - counts as first hdc
hdc decrease
hdc next 2 stitches (4 in between)
fphdc next stitch
*hdc next 4 stitches
fphdc next stitch
repeat from * around
join with ss to beginning hdc
R24)
ch 2 - counts as first hdc
hdc decrease
hdc next stitch (3 in between)
fphdc next stitch
*hdc next 3 stitches
fphdc next stitch
repeat from * around
join with ss to beginning hdc
R25)
ch 2 - counts as first hdc
hdc decrease (2 in between)
fphdc next stitch
*hdc next 2 stitches
fphdc next stitch
repeat from * around
join with ss to beginning hdc
R26)
On this one you start with a hdc decrease. I do it by skipping the ch 2 and pulling up a tall loop (which I pretend doesn’t exist) and starting the stitch in the first stitch
*hdc decrease (1 in between)
fphdc next stitch
repeat from * around
join with ss to beginning hdc
R27 - 28)
hdc decrease around. You should have 12 stitches remaining after these two rounds. I leave it open, but you can also use a yarn needle to gather it and pull it tight, closing off the top.
Now you have a floppy bag with an odd shaped opening.
with smaller hook attach the yarn to one side of the opening
sc around, picking up 1 stitch per row on the sides
join with ss to first sc
then add a row of ss along the top of your sc round.
Optional trim along top
If you changed colors like I did, you might want to add a bit of trim at the join. Don’t have to, it’s just decorative, but I like the finish it gives.
I just did a surface chain along the edge by holding the working yarn to the back of the fabric - inside the Kitty Keeper in this case - which was a pain btw...just a warning.
then pulling the yarn through the fabric with each stitch, first, pull up a loop at the location you want the first stitch to be, then moving over a stitch (where you want the second stitch to start) pull up a loop and through the loop on the hook. Keep working this around and you’ll have a flat chain stitch on the surface of your fabric. (it’s great for writing names etc. too)
No comments:
Post a Comment